10/10/2015

[Hard] How to customize Office 16 installation?

 en   zh  这是英文版本,请按 zh 来阅读华文版本。

Microsoft had released the latest Microsoft Office edition: Office 16 on 22 September 2015! But the offline installation had changed. It no longer gives user to choose what component to install. This method of installation is called Click-To-Run, or C2R. Since the release of Office 10, Microsoft already use this kind of installation method to 'ease' user setup procedures, while also causing user frustration. Installing everything into computer is very space consuming too.

EDIT : Microsoft had released a non-C2R version of Office 16 installer. You can download non-C2R version here. (Torrent)

Things Required 
- Office 2016 Deployment Tool [Important]
Office 2013 Click-To-Run Removal Tool [Use this before you install Office 16]
- Time: ~2 hours (Depends on how many app you want and your Internet connection speed.)
- A working Office 2016 serial key (To activate the Office 16)

A. Remove older version of Office
1. Launch the O15C2RRemove.diagcab to start the uninstalling.


If found anything, click Next to remove the older Office files. You should see it starts to Uninstall. Restart your computer when done.

B. Start Office 2016 Deployment Tool
1. Download the OfficeDeploymentTool.exe
2. Double click the tool, read and accept the Licence Term. Click Continue and select a location to extract the files.
C. Configure before running Office 2016 Deployment Tool
1. After you extract the tool, you will find 2 files in the folder, which is configuration.xml and setup.exe.
2. Right click the configuration.xml file and select Edit. Take a look at the content.
3. This is my preset to install ONLY Word, Excel and PowerPoint. Copy and replace the whole text with this. Don't save first, you are NOT ready to go with these settings.

<Configuration>
<Add SourcePath="E:\Office\" OfficeClientEdition="64" >
<Product ID="O365ProPlusRetail">
<Language ID="en-us" />
<ExcludeApp ID="Access" />
<ExcludeApp ID="Groove" />
<ExcludeApp ID="InfoPath" />
<ExcludeApp ID="Lync" />
<ExcludeApp ID="OneNote" />
<ExcludeApp ID="Outlook" />
<ExcludeApp ID="Project" />
<ExcludeApp ID="Publisher" />
<ExcludeApp ID="SharePointDesigner" />
<ExcludeApp ID="Visio" />
</Product>
</Add>
</Configuration>

4. Now, notice the BOLD words, you can change them. Below are the explanation for them.
(i) Add SourcePath="E:\Office\"
This set the location for the Office 2016 Deployment Tool office files download location, NOT installation location (You can't choose this no matter how.)


Recommended: Set it to your Download folder or external hard disk.

(ii) OfficeClientEdition="64"
Choose the Office version. 32 for 32 bit Office version and 64 for 64 bit Office version.

Recommended: Check your system type and choose the same version.


(iii) Product ID="O365ProPlusRetail"
This define the Office type you want to download.

Recommended: Leave it the same as my preset.
Available Options: ProPlusRetail, ProfessionalRetail, HomeStudentRetail, HomeBusinessRetail, O365ProPlusRetail, O365HomePremRetail, O365BusinessRetail, O365SmallBusPremRetail, VisioProRetail, ProjectProRetail, SPDRetail

(iv) Language ID="en-us"
This define the Office language. There are a lot of language ID but en-us, zh-cn and ja-jp are the common ones.

Recommended: Choose en-us if you need English only, zh-cn for Chinese and ja-jp if you are Japanese! More languages available in Available Options.
Available Options: Go to this website. The language ID you want is in the LCID String column. If no option available for you, use the ID in the Language code column instead.

(v) ExcludeApp ID="Access" ... ExcludeApp ID="Visio"
This EXCLUDE the app you don't want to install. If you want to exclude more, you can insert ExcludeApp ID="YOUR APP CODE" and replace YOUR APP CODE with the app you don't want to install.

Recommended: Refer to the Available Options to choose the app you don't need. If you want Word, Excel and PowerPoint only, leave it alone.
Available Options: (Self-Explanatory) Access, Excel, Groove, InfoPath, Lync, OneNote, Outlook, PowerPoint, Project, Publisher, SharePointDesigner, Visio, Word

5. After checking that all your settings are correct, you can save now.


D. Download the apps you need
1. Inside the folder where you store the extracted files, hold Shift key and right-click on blank spaces. Click on Open command window here


2. Type this command into command prompt : setup.exe /download configuration.xml and press Enter.


3. If you are following the instruction correctly, you should see an Office folder at the download location you had set previously. It will download all the required files from Microsoft.


4. To check if the download had finished, click on the command prompt. If it is done you should see second line of the directory.

E. Install Office 16
Finally, use the command prompt and type in this command : setup.exe /configure configuration.xml and press Enter.


It should take some time and eventually your Office 16 apps will appear in your desktop!


Credit
This tutorial was referred from this Facebook post and this askvg.com tutorial.
10/01/2015

Windows 10是最后一个Windows版本?

 en   zh   This is Chinese version, click en for English.

在Windows 10推出前几个月,微软宣布Windows 10为最后一个Windows版本。你没听错,Windows 10的确是最后一个Windows了,表示说以后没有所谓的Windows 11, 16或者20了

难道微软不想赚钱了吗?

微软开始以“Windows as a service" (Windows服务)的方式来升级了。一旦你买了Windows 10,你就永远不需要花钱去升级去新的版本。这个升级方式可以在其他操作系统看得到,例如苹果公司的Mac OS X和iOS,以及谷歌的Android。

我们还不知道微软会如何推出以后的升级版本,最有可能的方法就是像Mac OS X的方法一样,10.0去10.1,10.1去10.2,10.2去10.3然后一直下去。差不多像Windows 8升级去Windows 8.1。

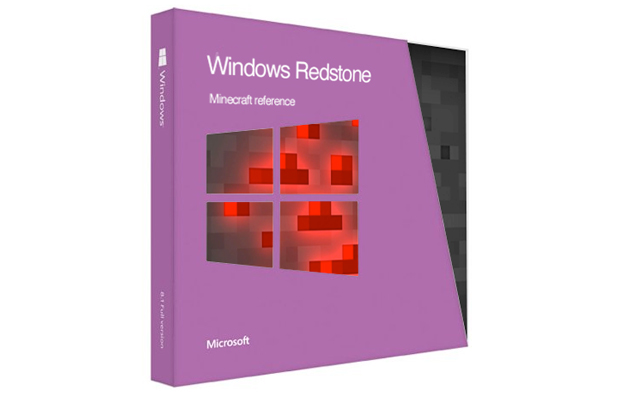
Windows 10.0版本的版本花名为Threshold。有人猜测Windows 10.1版本的花名是Redstone,一个来自我的世界的虚幻宝石。

Will Windows 10 be the last Windows?

 en   zh  这是英文版本,请按 zh 来阅读华文版本。

A few months before Windows 10 was released, Microsoft announced something 'big' : Windows 10 will be the last version of Windows. You heard right, Windows 10 is the last Windows that Microsoft will ever release, after that no more Windows 11 or 16 or 20.

But why? Microsoft decided to stop sucking customer's money on a Windows upgrade?

Microsoft will start updating the Windows as a 'service', which means once you purchased Windows 10, you don't need to pay again forever to receive updates. This is commonly seen in other operating systems such as Mac OS X, iOS and Android. They push out major update without the need to pay.

It is unknown how Windows will provide future updates, but a possibility is using the same method as Mac OS X which update from 10.0 to 10.1, 10.2 and so on, just like Windows 8 to Windows 8.1.

Windows version 10.0 is Windows 10, code name as Threshold. It was rumored that the next 10.1 update will be called Redstone, a virtual ore inside the game Minecraft.

9/30/2015

Recap of news for Minecraft (September 2015)

These are the latest version of Minecraft for all platform. (As of 30 September 2015)

Green   :  Official Builds            
Orange :  Development Builds  

Computer Version
1.8.8 (All, except for Raspberry Pi)
15w39c (All, except for Raspberry Pi)
0.1.1 (Raspberry Pi version)

Pocket Edition
0.12.1 (Android, iOS, Fire OS, Windows Phone, Windows 10)

Console Edition
TU 29 (XBox 360)
CU 17 (XBox One)
1.20 (All Playstation Versions)

Game development news
a) 15w36a - 15w40b
- The second month of development snapshots for Minecraft version 1.9.
- Notable features are entity collision, new 'The Void' superflat preset, spectator mode after dying in hardcore and some minor height adjust for mobs.
- Also added new behavior for horse called 'Skeleton Trap'. 


b) 0.12.1
- Originally going to release on 29 July to coincide with the release of Windows 10.
- Released on all pocket edition platforms from 4 September 2015 to 9 September 2015.
- New PC related feature such as Nether, brewing, enchanting and weather is added in this update.


c) Minecraft : Story Mode
-  Episode 1 of the story mode will be release on all Minecraft supported platforms on 13 October 2015 (Digital Version)
- Retail version will be release on 27 October 2015 instead.
- The first episode name is called 'The Order of the Stone', a reference to Minecraft older name "Minecraft: Order of the stone".

Minecraft fans news
a) Mojang worker made a map for new-comers
- The map is made by Marc Watson, a Mojang worker and Dragnoz, a renowned Minecraft builder.
- This map also includes a resource pack which contains voice over for the tutorial.

- The video takes about 1 month to finish!
- The torches along the way is sync to the song beat.


Other News
a) 0.13.0 for Pocket Editions might features redstone blocks.

9/06/2015

[中等] 如何安装我的世界地图

 OLD  这个是旧的版本 <: 5 / 2015 :>

我将会教你如何安装我的世界地图进去你的游戏哦!请注意阅读!

安装前
- 你要的地图
- 配合地图的游戏版本
- 拥有基本游戏设置的知识

安装
1. 去下载你喜欢的地图,我选择的是Diversity 2。你也可以在这里下载Diversity 2。

2. 下载时,花点时间去读基本需求,规则和其他讯息。这点很重要,因为会直接影响游戏!
3. 下载完后,如果文件是.rar或.zip,用解压软件来解压文件。


4. 确保解压后和图片看里来差不多一样,如果不是,可以开开全部文件夹来找找看这些文件,找到后把它移到最初的文件夹里。

打开看看。
继续打开。

这是地图主文件。


把它剪去最初的文件夹后,可以看下一步了。


建议:可以删掉不需要的文件。


5. 按Windows Key + R键,输入:C:\Users\%username%\AppData\Roaming\.minecraft\saves 然后按Enter。你会被带到去saves的文件夹。把地图的文件夹放进saves的文件夹。


建议:可以改掉你的地图名字。


6. 打开我的世界,更改你的游戏版本去地图需要的版本然后开启游戏。游戏开启后更改设置去地图的设置。接着你就可以玩了!


搞定!


9/05/2015

[Medium] Create a Minecraft server

 zh  <-- 萌萌哒!换去华语!
 OLD  This belongs to older version <: 5 / 2015 :>

Want to take one step forward? Make a server!

NOTE 1 : This tutorial is about creating Vanilla server, not Bukkit.
NOTE 2 : This tutorial is about creating server on your computer (your computer as the host), not using a online server.
NOTE 3This is not recommended for computer with less than 2GB of RAM, a very slow processor , or upload speed less than that of 1 Mbps. If any of this isn't satisfied, your server experience would be poor.

Prerequisites
- Latest Minecraft Server files
- Knowledge of your router
- Hamachi (No Port Forwarding needed) or Access to router settings (Port Forwarding needed)
- At least Pentium or similar, 4 GB of RAM, ~2 GB HDD
- Fast upload and download speed (Upload is generally more important here)

Download required files
Go to the official Minecraft download page to download the latest server files.


Install the server
1. Create a folder anywhere in your computer, that is folder where your server files goes.


2. Drop the .exe or .jar server files into the folder, then double click the server file. The folder should now look like this.


3. Open the eula.txt ,change the eula=false to eula=true. Save the text file.


4. Relaunch the server file again. This time the folder should look like this.


Configuring the server settings
Close the server console, then open the server.properties using Notepad.


Changing these is optional (but mandatory if you have friend using cracked launcher/account), you can check out what the settings does here.

Before we continue...
These tutorial below is essential for external network connectivity. If you want to play the server in LAN only, you can start the server by launching the server executable directly.

a) HamachiPros : No port forward is needed, uses P2P so it can be faster.
Cons : Have limited peers (Free version), other player also need to install the client in order to get into your server.

b) Port ForwardingPros : Unlike Hamachi, you don't need to let other player to install anything to connect.
Cons : Need access to router, will mess up your network if not done properly, susceptible to DDoS, but it will generally not happen unless your server grew big.

1. Identify your computer IP Address and Router IP.
Open command prompt and type in ipconfig ,look at the IPv4 Address and Default Gateway. Remember these as you need it later.

2. Use your browser to access the router settings.
Type in the IP Address of your Default Gateway into browser address bar.

3. Login to your router settings.
If you don't know the username or password you might need to check your router manual or ask your ISP for this. Check this tutorial to see how to find out your router password.

4. Look for the setting.
Look for either Port Forward / NAT / Virtual Server in your router settings. This usually located in a menu called Advanced Settings.

5. Setup the port forwarding setting.
For the Application name, type in Minecraft Server, For the Start / End port number, type in 25565 (Need to be changed according to your server setting) and for the Local IP Address, type in your IPv4 Address. Then save the settings.

OPTIONAL : You may need to consider use a static IP for your computer so it won't change every time you restart your router or computer. This is useful as you need to restart router everyday and you have plenty of connected devices.

Finished
After all the hassle, your simple server is done! Go find your External IP address including the port and give it to your friends so they can join the fun! 


[中等] 设置一个原版当个创世神伺服器

 en  <-- Greetings! Click here for English!

想要证明你是我的世界高手?弄一个伺服器吧!

注意 1 :这个是弄一个原版伺服器,不是插件伺服器。
注意 2 :这个教学是把伺服器装在你的电脑,不是叫其他伺服器帮你开。
注意 3 :不建议任何少过2 GB RAM的电脑,很慢的处理器或者少过1 Mbps上传速度的网速。任何这三点不达标,你的伺服器会运行很慢。

材料
- 最新的我的世界伺服器文件
- 基本路由器的知识
- Hamachi (不需要Port Forward)或能进入路由器更改设置(需要Port Forward)
- 好的处理器,4 GB RAM,大约有2 GB硬盘空间
- 很快的上传和下载速度(上传在这里会比较重要)

下载伺服器文件
去我的世界官网下载最新的伺服器文件

安装伺服器
1. 在桌面弄一个新的文件夹。在里面放置你的伺服器文件。

2. 放置你的.exe或.jar的伺服器文件在那个文件夹,再双击你的伺服器文件。现在你的文件夹会有以下的文件。

3. 打开eula.txt,更改eula=falseeula=true。保存文件。

4. 重开你的伺服器文件。现在文件夹会有这些新文件。

设置你的伺服器
关掉伺服器的控制台,然后用Notepad打开server.properties

你没必要去更改这些设置(除非你有朋友是用盗版来玩),你可以在这里查看这些设置是做什么的。

继续之前...
以下的教学是给公开性加入。如果你只想在同一个网络里玩,你可以打开伺服器并开始玩了。

a) Hamachi
好处:不需要Port Forward,利用p2p的技术会加快速度
坏处:有限制(免费版),其他玩家也需要安装Hamachi来玩。

b) Port Forwarding
好处:玩家不需要安装任何东西。
坏处:需要进入你的路由器来更改设置,如果弄错会导致上不到网,会遭遇DDoS攻击(如果你的伺服器是非常的多人玩)

1.检查你的电脑IP和路由器IP。
打开Command Prompt然后输入ipconfig,寻找IPv4 AddressDefault Gateway。记下后面的IP,等下需要用到。

2.用你的浏览器进入路由器设置。
在你的浏览器输入Default Gateway的IP Address。

3. 登入你的路由器
如果你不懂你的用户名字或密码,你可能需要看看你的路由器的教学本或者问你的网络公司。你可以用这里的教学来找出如何得到密码。

4. 寻找设置
去找 Port Forward / NAT / Virtual Server 的设置,通常他们是在Advanced Settings里面。

5. 设置Port Forward
Application Name输入Minecraft ServerStart / End port number 输入 25565 (根据你的伺服器),最后Local IP Address输入你的IPv4 Address。按Save来保存设置。

建议:你可能需要设置一个固定的电脑IP Address所以每次你重启电脑或路由器不会换掉。这个非常适合那些常常重启你的路由器的玩家。

完成
经过许多的设置后,你的伺服器也完成了。去找你的External IP Address,包括Port,然后给你的朋友好让他们加入你的伺服器!